Wednesday 31 July 2013

Lime Crime Velvetines in Red Velvet

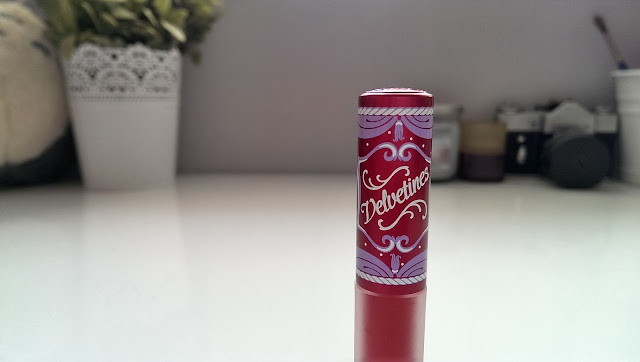
The lime crime velvetine in red velvet

This is one of those products that I searched for and searched for, and patiently waited for it to be restocked.  Then one day, out of the blue, boom, there it was on the Cocktail Cosmetics website.  I put that bad boy in my virtual basket quicker than you can say 'Lime Crime Velvetine, you're mine!'.  Adding a couple of other products to my basket I hastily checked out before they sold out again.  A few days later this little beauty was in my sticky paws waiting to be adorned.

Luckily for me I had a party to go to just two days after it joined my family of lip products, so, here's what I thought.

A close up of the red velvet velvetine

Before and after pics of the lime crime velvetine in red velvet
** left, me before heading out, right, me after about 5 hours of drinking cocktails **

My Thoughts
Holy mother freakin' moley do I like this.  Just to get some idea of the staying power of this, after the party we headed back to my friends house who's birthday celebration it was.  We continued drinking and partying there.  At about 1am I headed to bed (we were staying at their house) in somewhat of a state.  I was far too drunk to even think about taking my makeup off, so I collapsed in a heap on the bed fully clothed (except for shoes and sunglasses which had lived on top of my head the whole night).  At about 5am I stumbled out of bed to go to the bathroom, looked in the mirror only to see my lipstick was still impeccable!!! In fact, it wasn't super easy to remove, some of it clung on for dear life before I was happy to show my face in public!

The only re-applying I needed to do was along the line where my lips meet - for me, that always disappears quite quick, but this wasn't too bad, I just kept my eyes on it.  I love the red velvety finish and how it didn't bleed outside of my lips, it didn't go patchy, but it stayed beautifully perfect even through to the next morning.

I have not one shred of regret in purchasing this, and I can't wait for an opportunity to wear it again!  Just be sure to prep your lips first to make sure you'll have a perfect base for applying it.  I used the Lush sugar scrub in Mint Julips first, and applied lip balm while I was doing the rest of my makeup until I came to the lips (which I saved until last).  I lined my lips first using a Neve pastello lip liner in Crimson.

I picked up mine from Cocktail Cosmetics for £11.50 - and at last check (now), they're still in stock!


This months Bigest-Pixi3 advertiser is the lovely Stacie from Life is worth the fight

 
Written by Georgina Kent
SHARE:

Tuesday 30 July 2013

Pink fun nail art

I've had my nail art kit for what... 2 days?  Already addicted!  As you may or may not know, I have a very arty background, so nail art is something I've been really keen to get into but until now I never had the tools.  But now I have this amazing nail art kit (the one that was in the blogger goody bag from Saturday) I can create all sorts of nails!  If you want to know which nail kit it was, it's by Rio and it's the Ultimate Nail Art, Professional Nail Art Collection - it's £29.99* and available on their website here.
Pink nail art - candy stripes, polka dots and more
** Excuse the quality of the photo, but this was taken late at night and with a flash **

I was sitting down last night to write today's blog post and I felt inspired not to blog, but to paint my nails.  They're horrifically weak at the moment and varnish is barely lasting 1 day, so I don't expect much out of these, however, I couldn't resist :)  I did forget to photograph the base coat, but it's the one I recently blogged about, Essie's Off the Shoulder.  So, as much as this isn't a 'step by step' guide, I'll try to show you how I did it :)

To do this look, you will need the following;
A collection of nail art utensils

Step 1 - I should have used a base coat (clear) but I didn't (far too impatient!) so I used two coats of Essie's Off the Shoulder.

Step 2 - I took the white nail art pen (it's a long thin brush) and painted candy stripes down my thumb nail starting at the centre and working outwards.

Step 3 - Polka dot ring finger - I used the same brush and pot (white nail art pen) and simply dotted it on my finger, again starting from the middle.

Step 4 - I picked out 3 different pinks from the rhinestone wheel, dotted the adhesive in a line down the centre of my middle nail and placed each one on each dot, I started with the darkest pink nearest my cuticle.  I pushed down on them to help them set.

Step 5 - French mani - I took the same white nail art pen and drew a line across the tip of my little finger, filling in the very tip.

Step 6 - Glitter!  From the nail art kit I picked out a mini glitter in a snowy shade, covered my index finger in clear nail varnish and used a brush to pick up the glitter from the pot and add it to near my cuticles.

Step 7 - Cover all nails with a thick coat of Essie's Good to Go clear top coat which helps the nails dry quickly, gives them a glossy finish and helps the varnish last longer (unless you have horrifically weak nails like me!).

So there you have it, it really wasn't very difficult, all you need are patience.  It took me about an hour, but that hour went super quickly :)  And, to be fair, half that time was spent deciding what to do on each nail :)

If you decide to have a go at re-creating this look, please send me your pictures on Twitter so I can re-tweet them :)


This months Bigest-Pixi3 advertiser is the lovely Stacie from Life is worth the fight

 
Written by Georgina Kent
SHARE:

Monday 29 July 2013

July Blogger Meetup

Wow, was that a crazy busy weekend or what!  On Friday I set off to London with the hubby in tow and a couple we're good friends with.  After getting across London and checking in to our hotel, we grabbed a quick bite and headed down to the Sea Life centre.  Now, some may say in what felt like 40 degree heat that may not have been a good idea, but throwing caution to the wind we went there anyway.  Filled full of tourists on the muggiest day I've ever experienced we headed in to see the aquariums.


We saw sharks, alligators, turtles flailing their hands in each others faces (true story... you had to be there), fish from the Finding Nemo tank, cool Jellyfish and two French girls who thought they were on a high fashion photo shoot, only it was just them two posing and looking a bit silly.  After two hours there we were done, we'd been up since 7:30am, travelling and getting ready etc, so we headed to the Slug and Lettuce for some cocktails and dinner.  We were back in our rooms by about 11pm, I finished the night off in the hotel bar with a camomile tea, let no one tell me I don't know how to live on the edge!

On the Saturday we were up bright and early to get ready for the July Blogger Meetup organised by the lovely Helen from Beautifully Superfluous.  We (my friend Vicki and I) arrived at Tiger Tiger about 5 mins late and in a bit of a sweaty mess after navigating the London Underground.  We swiftly purchased 2 pints of lemonade (which came to an astonishing £7!!!) to help cool us down and rehydrate after all the aforementioned sweating.

There were a couple of great highlights, finally meeting Natalie from NatalieRoseanne.com (she actually won my very first giveaway over a year ago!), re-meeting Sasha from Ramblings of a Beauty Bird (she organised a Bristol meetup I went to a few months ago, but we never had a chance to chat, she was so so lovely!), re-meeting Kat from Tales of a Pale Face (I met her before at the Xmas London blogger meetup in December but again, didn't have much of a chance to chat),  and of course Grace from All That Slap (she's bloody mental!).  I also met lots of other super lovely people, like Vicky from Bare Foot days she was another crazy but lovely one :)

** Me on the left, Natalie on the right **

** Me on the left, Grace on the right ** excuse the blurry photo!


Paperself were also on site doing everyone's lashes, I opted for the little butterfly ones, I say little... they were pretty massive, and that was 1 lash cut into 3, so yeah they might be £12 a go, but if you chop each of them into 3 and use them on the outer edge, you'll get a lot of uses out of them, plus they're re-usable too.

** My butterfly lashes **

** My friends leafy lashes **

After a couple of hours of socialising Helen handed us some pretty awesome goody bags, the only products not pictured are a Benefit They're Real (I gave it to my friend that attended as I've already got one and blogged about it), and a Vivo lipstick (which was in my bag as I wore it today).  For me, the highlight of the goodies has to be the seriously amazing nail art kits we were given.  Nail art is something I've been wanting to get into for a while but never had the tools, well, now I have no more excuses :)  Tonight, just a few hours after getting back home, I've now done my very first nail foils, they may not be perfect, but I love them! I'm going to have so much fun doing lots of different nail looks with these, I'm already feeling inspired :)  I'll be doing some blog and YouTube tutorials for different looks once I've got to grips with it myself too.


So that was my super busy weekend in London, I did of course shop too, there'll be a haul video going up on my YouTube channel this week of my new purchases, so if you don't want to miss that, head over to and subscribe :)

What did you get up to this weekend?


This months Bigest-Pixi3 advertiser is the lovely Stacie from Life is worth the fight

 
Written by Georgina Kent
SHARE:

Sunday 28 July 2013

Keeping it local: Gel nails

If you've been reading this blog for any length of time, you may be aware of the condition my nails are in.  About a year ago I stopped biting them.  On and off I had acrylic nails done to help me stop biting them when they got all weak and short and eventually I felt I had it under control.  Scroll back about two weeks ago and I was posting lovely pictures of my nice long strong nails.  Then, I don't know what happened, but they got really weak and flakey and then short, very short.  I kept filing them and filing them back when they would tear or get a bit long, and to stop me wanting to bite them.

So I put a call in to my usual acrylic girl, she knows the drill by now!  I wanted them done ready for London yesterday but she was fully booked up until the first week of August.  Then I remembered that my friend Charli (from Charli...) had gel nails done in the village I live in and loved them, so I thought I might give that a try instead and hopefully save my nails more than if I had acrylics, especially as I tend to end up ripping them off (I know, that's really bad...).

Let me introduce you to Jodie's Luscious Locks - she specialises in hair extensions and gellish nails, of course, I was there for nails :)  She fitted me in with only a couple of days notice and for a reasonable price (£15, compared to when I get acrylics done for £30).  Here's a bit of a photo diary of it :)

My natural nails before the gel polish applied
The awful state of my nails before hand, they were seriously weak and bendy :/

The gel base coat being applied
Base coat a go-go :) 

My nails under the UV light having the teal colour set
Colour being set (I went with a nice teal) 

The silver and holographic glitter being applied to my nails
Silver and holographic glitter being expertly added to the half moons of my nails (and faded upwards) 

My finished nails looking really pretty
Voila! They've grown quite a bit in the last week since these were done!

At the time of writing this I've had them on/done for 6 days - by the time you read this though, it'll be more like 10 days (writing this well in advance as I'm away) :)  So far, there's been no chipping or anything nasty like that, just one nail has a scratch in it (which was my stupid fault) but that's it, they're looking as perfect as when they were done, just slightly longer :)  I'll be interesting to see how long they do eventually last for, or whether I end up just getting bored of them and fancy a different colour, but I am using this in place of acrylics as a way to help me grow my nails again.

Jodie was really lovely when I was there, despite me being late!  She was chatty and professional, I'd definitely go to her again, especially as she's walking distance from my house :)

If you live in the Cardiff area and are looking for gel nails or hair extensions give her shout :)

If you're based in Cardiff I'd really recommend her, here's where you can find her and get in touch:


This months Bigest-Pixi3 advertiser is the lovely Stacie from Life is worth the fight

 
Written by Georgina Kent
SHARE:

Saturday 27 July 2013

Cocktail Cosmetics haul

I have to confess, since coming off my 100 day spending ban, I have gone a bit haul crazy.  It's mostly lots of little hauls, but they soon add up!  Anyway, one of the things you've said you'd like more of is haul posts, so here you go <3

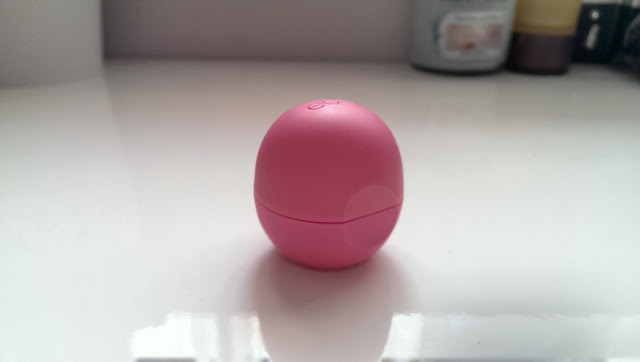
EOS lip balm in strawberry sorbet
EOS lip balm in Strawberry Sorbet £5.95

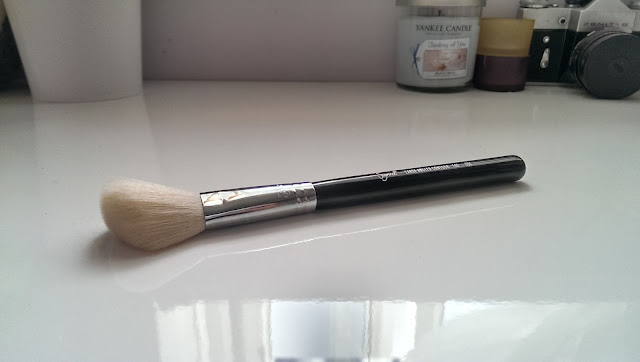
Sigma F40 brush
Sigma F40 brush (so soft!!!) £13.95 

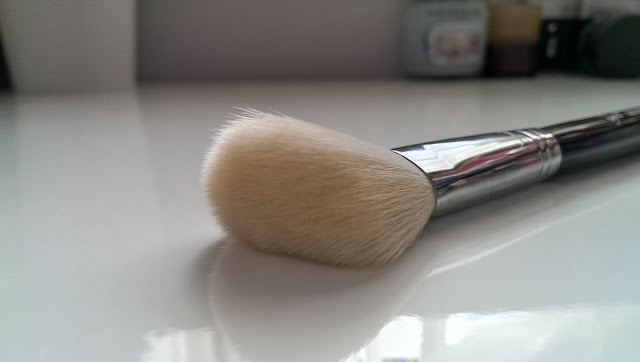
Closeup of the Sigma F40 brush
Sooooooft! 

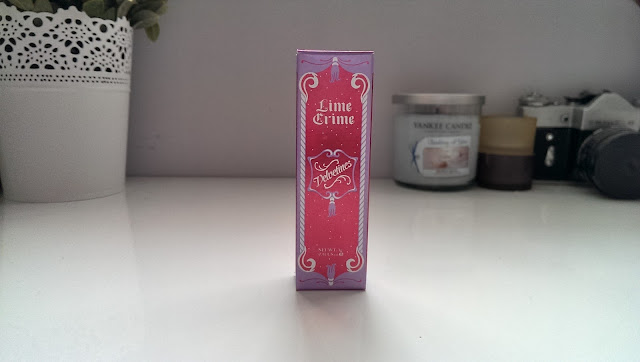
A lime crime velvetine in it's box
Lime Crime Velvetines in Red Velvet (oooh mama!) £11.50 

A close up of a Lime Crime Velvetine in Red Velvet

A Sigma extended wear liner in it's box
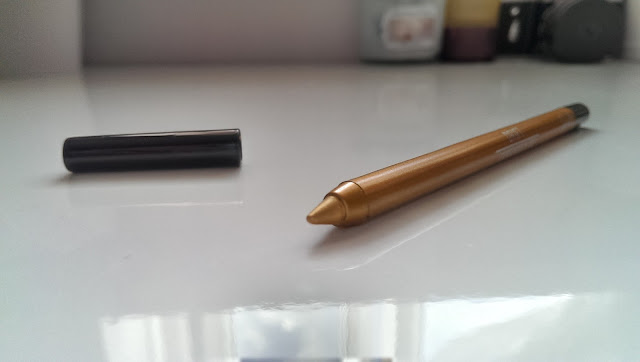
Sigma extended wear liner in Drift £8.95*

A close up of the Sigma extended wear liner pencil tip

I was super chuffed when I saw Cocktail Cosmetics had the Lime Crime Velvetines back in stock, I'd been patiently waiting for ages and checking on lots of different sites to see if they were back in stock and finally they were!  I do have some pics of me wearing it on a night out too, but I'll save them for my review of it, so keep your eyes peeled for that :)  As a little teaser, I will say I went to bed in quite a state that night (don't underestimate what a state I was in, my hangover lasted 2.5 days!), and had ALL my makeup still on, including the Red Velvet lipstick, and it was still there looking near perfect in the morning.

The Sigma brush is so so so soft!  Perfect for contouring with bronzer which is what I bought it for, and the fact that I wanted to own a Sigma brush and see what all the fuss is about, well, that's now backfired a bit as I want more!  I'm not sure which I'd pick next, maybe the E40 blending brush, or E30 pencil brush... but, if I'm really honest with myself, what I really want is this beautiful wonderuss collection, the 5 Kabuki brush set, but I don't think I could bring myself to pay all that money for them!

The EOS lip balm is a no brainer, it's now #3 in my collection and has a very happy home next to my laptop on my desk.  My first one was the Honeydew/Honeysuckle one which I had in a makeup swap with a lovely lady from Canada, that one has a real sweetness to the taste.  Then I had the Lemon Drop one which is a really refreshing scent, and now the Strawberry one, yummy!

Finally, the Sigma eye pencil, I haven't used this yet, but I'm seeing it as an under eye liner to be heavily blended to give a light glow, what do you reckon?

So that's my littleish haul - no doubt there'll be another one next week after my trip to the London blogger meetup on Saturday :)


This months Bigest-Pixi3 advertiser is the lovely Stacie from Life is worth the fight

 
Written by Georgina Kent
SHARE:

Friday 26 July 2013

Feature: DIY Nurturing hair mask by Luchessa

Hello and good day dear readers and friends of makeup-pixi3.  Hope you are all doing well and enjoying this summer day.  When Georgina offered me a spot on her lovely blog for a guest post, I didn’t have to think about it twice. So here I am, the writer behind {Beauty expression by Luchessa} - ready to present a simple, but very useful DIY tip.

Let’s see, if we can pamper and nurture your hair a little.  I’m sure everyone has heard about a honey & oil or even the egg and milk mask to make the hair smooth and the scalp very nurtured (especially after all that changing weather).  But what about a Kefir & Egg yolk & Olive oil?!


What is Kefir some of you might ask? Kefir is cultured, creamy product, which can be made from any type of milk, cow, goat or sheep, coconut, rice or even soy. It’s a great source of biotin and contains Vitamin B12, B1, and Vitamin K.

Besides being a great healthy & natural drink (similar to Ayran, Yogurt or Buttermilk), it’s also incredibly good for your skin and hair.

For this Hair Mask you will need:


- 100 ml (about 0.416 cups) of Kefir
- 1 egg yolk
- 3 tablespoons of olive oil

1) Pour 100 ml of Kefir into a small bowl (make sure it’s not coming right of the fridge)
2) Add egg yolk
3) Add olive oil
4) Stir until everything is mixed evenly
5) Massage the mix into your scalp first and then spread it over your hair
6) Coat your head with (a shower cap if you like) a towel and let it sit for 30 min
7) Wash everything off and condition as usual

pssst – can you see the crazy frog in this picture? ;)

The hair mask is really easy to make. Of course you can also use buttermilk if you prefer it or if it’s easier to get in your area.  Make sure to keep your hair warm and coated, while it’s under that towel and enjoy your nurtured and happy hair afterwards.  This is something I've been doing for years and it’s one of my go-to hair masks. Please let me know, if you tried anything similar or if you give the Kefir mask a go.

Don’t be shy and chat with me on Twitter or visit my newly self-hosted beauty & lifestyle blog: Luchessa.org

Have a wonderful day and happy pampering!!


This months Bigest-Pixi3 advertiser is the lovely Stacie from Life is worth the fight


SHARE:

Thursday 25 July 2013

Essie off the shoulder

Essie's Off the shoulder pink nail polish

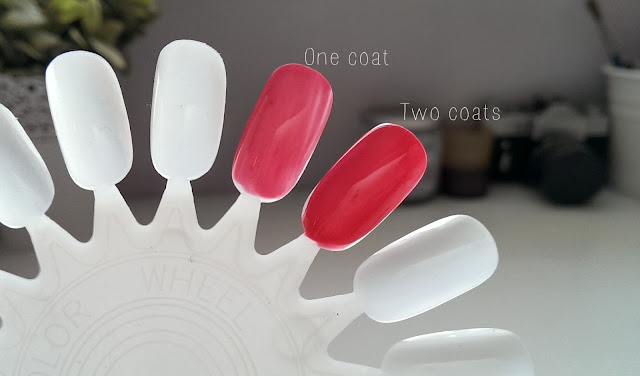
Swatches on a nail wheel of Essie Off the shoulder

Essie's off the shoulder next to swatches of it

You know when you find a brand, and you really struggle to find any flaws in any of their products? Well, that's me with Essie.  I've built up quite a nice little collection of their polishes, and funnily enough my favourite of which has to be their amazing top coat - it's worth it's weight in gold.  Well, now I have a new addition to my little Essie family, and that's the shade 'Off the shoulder', I love the names they give polishes (bit like OPI) and I'm not really sure where they were going with this name, maybe sunburn?  Anyway, I digress!

Like all Essie nail polishes you'll need a good two coats, but when you've added both coats and a nice glossy top coat, people are going to think you're wearing lovely perfect false nails.  That's the reaction I get with Essie polishes.  They're thick and creamy and when they set they're highly glossy - at least with their top coat they are.  I have a couple of different pink Essie shades now, like Cascade Cool (a slightly lighter shade than this one) and really love them.  Sadly I have gel nails on at the moment as my nails have decided to hate me and go really weak.  But, when they're a bit stronger this little baby will be pride of place on them!

So, sadly I can't comment if this particular shade is any more durable than their others, but if my past Essie experience is anything to go by, it should last you a good 3-7 days with a good top coat on fairly strong nails.  You'll get about 2 days out of it if your nails are weak - at least, that's the experience I've had with their other polishes.  This is such a great colour for Summer, and kinda perfect for toes too, especially toes in the beach :)

You can pick up some lovely Essie shades for £1.99* at Halfpriceperfumes.co.uk which is where this little baby came from.


This months Bigest-Pixi3 advertiser is the lovely Stacie from Life is worth the fight

 
Written by Georgina Kent
SHARE:

Wednesday 24 July 2013

Feature: 5 Homemade hair treatments

Having great hair usually means having great products and styling tools, but those things can quickly add up and before you know it you're broke (but at least your hair looks great, right?). Skip the store and leave your wallet at home, cause you can keep your wallet full and have great hair by making your own! In fact, you probably already have all of the ingredients you need living in your pantry! So save your money for great haircuts like the ones at Rush Kingston and leave the rest to your kitchen. Check em out!

Hair Repair Treatment:
A hair repair treatment is great if you're hair looking a little dry, dull or damaged. It's also great to do after a long winter or summer season. Give your hair some life with this recipe:

Ingredients:
1 Tablespoon Apple Cider Vinegar
1 Tablespoon Olive Oil
2 Tablespoons Honey

Directions:
Mix all ingredients together in a bowl. Apply directly to dry hair by starting at the roots and working your way down. Leave in your hair for thirty minutes, then rinse it out with water. Wash your hair with your favorite shampoo and conditioner.


Sea Salt Spray:
Sea Salt spray is a great way to give yourself that "just left the beach" look without ever coming close the ocean. The problem is, the good bottles tend to be fairly expensive. But luckily, there's no reason to break the bank when you can make a just as good spray at home.


Ingredients:

8 Ounces of Hot Water
4 or 5 drops of essential coconut oil
2 Teaspoons of Coarse Sea Salt
1 Teaspoon of Hair Gel

Directions:
Add all of the ingredients into a spray bottle. Shake until the salt has dissolved. Then spray into damp hair and scrunch it dry or apply to dry hair to give it that messy look.


Homemade Shampoo and Conditioner:
Using homemade conditioner and shampoo is a great way to save money and protect your hair from products that actually strip your hair of it's essential oils. Restore your hair's glory with these recipes.

Ingredients:
Shampoo:
1 Tablespoon Baking Soda
8 Ounces of Water

Conditioner:
1 Tablespoon of Apple Cider Vinegar
8 Ounces of Water

Directions:
Shampoo:
Pour into a new or clean empty shampoo bottle. Mix well. Apply to hair and massage into scalp for a minute or so. Shake well before each use. Follow with homemade conditioner.

Conditioner:
Pour both ingredients into a squirt or spray bottle. Mix well. Apply to hair and massage into scalp for a minute or so. Shake well before each use.


Heat Protectant Spray:
You should definitely consider using heat protectant spray if you use a lot of styling products like hair straighteners, curling wands and blow dryers, It not only makes styling your hair easier, it also protects it from heat damage!

Ingredients:
3 Tablespoons of Water
1 Tablespoon of Conditioner
2 Teaspoons of Hair Spray

Directions:
Mix all ingredients into a small spray bottle. Apply to hair before using any heat styling products. Use afterwards to help tame flyaways.


Shiny Hair Mask:
While some people are born with naturally shiny hair, most of us aren't, but that doesn't mean we can't fake it. Make a Shiny Hair Mask and watch as your hair glistens even when it's overcast.


Ingredients:
1 egg
1 Tablespoon Olive Oil

Directions:
Mix both ingredients together in a bowl. Apply to dry hair and let it sit for 15 minutes. Wash it out with cool water (to avoid cooking the egg!) and then shampoo and condition as you usually would.

Melissa is a Rush Hairstylist and active do-it yourselfer, who's always looking for the next best recipe.


This months Bigest-Pixi3 advertiser is the lovely Stacie from Life is worth the fight


*
SHARE:

Tuesday 23 July 2013

New Look haul

Well, well, well, it had to happen at some point, my first clothing haul!  Of course I've bought clothes since I started blogging, but never blogged about it, until now!!!

On Friday I'm heading off to London ready for the blogger meetup.  I'm also a little fed up of wearing the same old tired clothes all the time, so last night after work I popped to New Look (one of my new favourite places for plus size clothing) and picked a couple of bits up.  So without further ado (and excuse the photo's, I don't really have anywhere good to photograph clothes!) here's what I bought :)

A plain black cami
A plain black cami which was about £3.50 - my old ones are... well... old!  This one feels really soft too. 


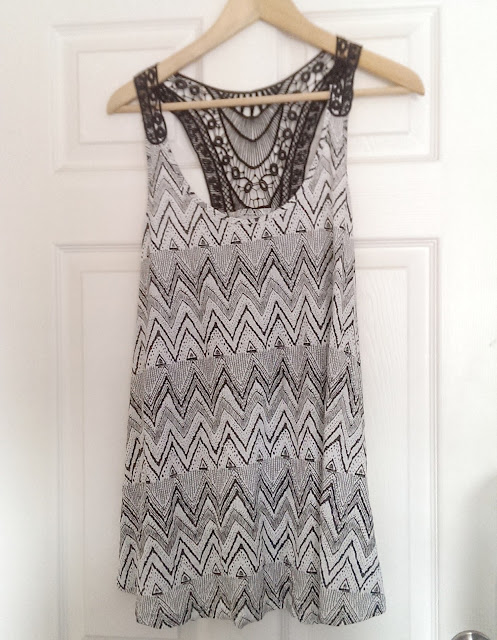
New Look Aztec top
You just can't escape the Aztec print right now!  I liked this because of the nice back and the pattern is quite flattering :)  This was £12.99


An owl print cabin bag from New Look
This I wanted to take my hairdryer, straighteners, hairbrush and makeup in to travel to London.  It won't all fit in our little suitcase so this was a great alternative, and it was only £14.99 and covered in cute owls :)

ASOS
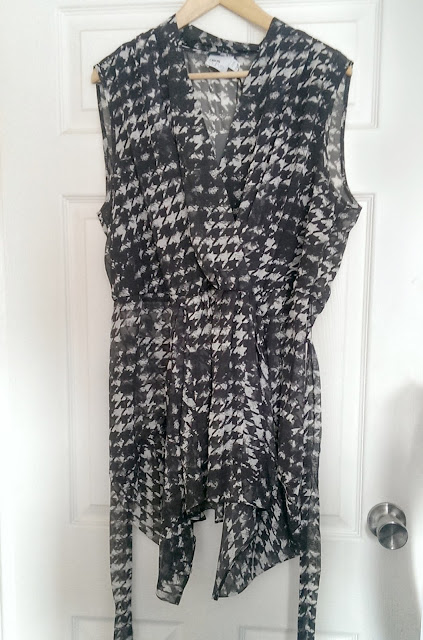
A black and white top from ASOS
I'm just throwing this one in too - it was from ASOS and it's what I plan to wear (with a black cardi) on the day of the blogger meetup (with really dark blue jeans and my DM shoes).  It was £35 :)

So that's what I bought - not that exciting but hey, it's my first clothing/fashion haul - I hope you liked it as something a little different, let me know if you'd like to see more posts like this and if you do I'll be sure to share them with you :)  Oh, and if you're going to the meetup on Saturday make sure you come and say hi :)


This months Bigest-Pixi3 advertiser is the lovely Stacie from Life is worth the fight

 
Written by Georgina Kent


*
SHARE:

Monday 22 July 2013

Pixi3 loves - Megan Jane Jewellery


Teapot £4 | Matching up earrings £3.50 | Dish earrings £1.99 | Milk jug necklace £4


I can't quite remember how I discovered Megan Jane Jewellery - but oh boy am I glad that I did!

I immediately loved her cute jewellery and swiftly placed an order for some cute little cup earrings & some little dish earrings.  All the jewellery (that she currently has up) is made out of dolls house china that she turns into little adornments.  The earrings came within a couple of days and were only £1.50 (plus P&P).  I loved them and started wearing them straight away - the first day I did, I had 5 compliments on my earrings, 5!  The next day I wore the little dish earrings, they were a little harder to work with as they were pulling forward a little but they looked really cute.

I really wanted to pick up up a couple of the necklaces too but I wasn't keen on the gold chain (I'm not *that* into gold) so I tweeted Megan and asked if she'd be able to put them on a silver chain - she replied straight away with a yes, and set up a custom order for me.  Just like the first time, the package turned up just a couple of days later and I couldn't be happier with them.

Megan has been so lovely and I adore her jewellery - I highly suggest you check out her lovely blog and the jewellery she has for sale, it's all so reasonably priced!

I think a silver bracelet will be next item to go in the shopping cart :)

You can find Megan here: Blog | Twitter


This months Bigest-Pixi3 advertiser is the lovely Stacie from Life is worth the fight

 
Written by Georgina Kent
SHARE:

Saturday 20 July 2013

Get the festival look

I must admit, I haven't been to lots of festivals, but I've been to the best in my opinion (Glastonbury).  Back in the day when I was a student, I had the opportunity to work Glastonbury, which meant a free ticket, a secure camp site right in the middle of the action, free food & drink, and I got paid £250 for the 5 days we were there, this was in 2000 when David Bowie headlined.

Back then I was rocking bright pink hair and wearing very hippyish clothes, I felt right at home there.  I went with my cousin Sophie and we spent our time divided between seeing all the bands we liked (I was chuffed to see the Bloodhound Gang!) and working in an Italian ice cream parlour at the side of the Other stage.

Here are my tips for re-creating my old look (sorry I don't have any photo's though, they're all hidden away on actual printed photo's) but here's one taken about 2 years after (like, 11 years ago once I dyed my hair dark) :)


If dying your hair isn't something you want to do, hair chalk is a great alternative.  Back when I went to Glastonbury hair chalk didn't exist, but if it did, I'd have had rainbow hair!!!  I found some on ebay, they seem to range from about £5 to £10 depending on what set you go for.


My festival look was to keep it simple as lets face it, you're most likely to be covered in mud for a good proportion of it, I wanted to be comfortable too as I was going to be on my feet a lot both working and watching bands.  Back then I had a really different look than I do now, it was all about big boots, black clothes (I never wore colour), dark eye makeup (never lipstick, bronzer or blusher) and well just being a bit different :)

To help you get into the festival mood the good people at New Look have also shared a really good infographic - this is the first one I've decided to share, most of the time I think they're quite rubbish, but this one I really like - it looks at different festival looks through the ages since the late 60s, here's the link to it, enjoy!

What's your favourite festival look?


This months Bigest-Pixi3 advertiser is the lovely Stacie from Life is worth the fight

 
Written by Georgina Kent


*
SHARE:
© Makeup-Pixi3. All rights reserved.
BLOGGER TEMPLATE DESIGNED BY pipdig