Sunday, 29 November 2015

RECIPE | Quorn biryani

When I decided to move away from beauty to lifestyle, one of the things I really wanted to do was more recipe posts - I really enjoyed doing them on my mummy blog. Today I bring you my recipe for my own quorn biryani.  Back before I became vegetarian I used to make this with chicken instead, the recipe and process was exactly the same, I just swapped chicken out for quorn.

For this recipe I use 'chefs measures', so basically I haven't measured anything, I just chuck it all in and hope for the best, it pretty much always turns out well :)  So, for this recipe you will need:

Basmati rice (enough for however many people you're making the meal for)
Fresh coriander
Sultanas (a couple handfuls)
Small packed flaked almonds
Jar of curry sauce (I use korma sauce)
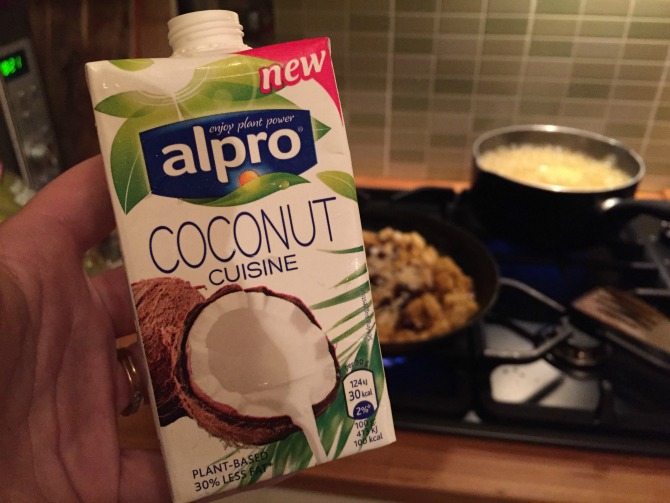
Coconut milk (I've been using the Alpro* one recently)
A packed of quorn chicken pieces (or actual chicken, whatever you like)
Salt

It'll take about 10-15 mins to cook :)

Ingredients

Method
1. Boil the kettle and get the rice cooking
2. Chuck the quorn in the frying pan with a little oil, once it's starting to cook, add 1 or 2 dessert spoons of the curry paste and a splash of boiling water.  Give it a good stir.

Quorn in the pan

3. Add about a third-half of the flaked almonds and a good handful of the sultanas

Quorn mixture with flaked almonds and sultanas

4. Roughly chop the coriander
Chopped coriander
5. Stir in your coconut milk - or in my case, the Alpro coconut cuisine (I actually prefer this to normal coconut milk, it doesn't separate, it tastes really coconutty and has much less fat)
Alpro coconut cuisine

Pouring the Alpro into the mixture

6. Give it all a good stir and let it simmer while the rice finishes cooking
Quorn simmering away

7. Next up, strain off the rice, chuck it in a big mixing bowl and add the quorn coconut mixture, the coriander, the rest of the flaked almonds and another good handful (or two) of the sultanas and a good sprinkle of salt.  Give it a good stir, serve it up in your favourite bowls with a knob of butter.
The finished product, ready to eat

Et voila, it's ready for demolishing :)  This is one of our favourite meals - it's also really nice reheated the next day.  Just make sure you don't keep it for long or reheat it more than once, rice can be nasty with that and goes off pretty quickly.  I certainly wouldn't keep it in the fridge for more than 1 day before eating :)
SHARE:

Wednesday, 11 March 2015

RECIPE: The perfect victoria sponge

Victoria sponge with vanilla buttercream icing and apricot jam

Victoria sponge with vanilla buttercream icing and apricot jam

Something you might not know about me (unless you follow me on Instagram) is that I love baking, and victoria sponges are one of my favourite treats to bake.  I've tried lots of recipes, and this one is my favourite - all credit for the recipe goes to Jamie Oliver!  It's in his 'Cook with Jamie Oliver' recipe book, but there's a couple of things I leave out.  One of the things I really like about this recipe is how easy it is to remember, 225g of everything, and 4 eggs :)

Ingredients
For the sponge:
225g softened unsalted butter
225g caster sugar
225g self raising flour
4 eggs
(the recipe also suggests the rind of one lemon, but I prefer it without)

For the buttercream:
75g softened unsalted butter
175g icing sugar
1 cap of vanilla extract (I use the Sainsburys Taste the Difference Madagascan vanilla extract)

Apricot jam

Method
1.  Preheat the oven to 180c (160 fan), grease and line with baking powder 2 x 20cm baking tins
2.  Cream the butter and sugar together until light and fluffy (I usually do this with a wooden spoon)
3.  Mix in the eggs one by one (I use an electric hand whisk for this)
4.  When the mixture is light and well blended, fold in the flour (be careful not to over stir it as you'll stir all the air out of it)
5.  Spread the mixture evenly between both tins and bake in the oven for about 20 mins, or until golden
6.  While the sponge is backing, make the buttercream by mixing the butter and icing sugar together until you get a soft workable paste
7.  When cooked, take out and cool
8.  When the sponge has cooled but is still a tiny bit warm, spread a layer of apricot jam on one sponge, and spread the buttercream onto the other sponge.  Then place the one sponge on top of the other, and dust with icing sugar.

Tip: If you're planning on covering the sponge with royal icing (the sheet icing), then use a bread knife to cut the domed part of the top sponge off so you get a nice flat top on your cake.  If you do this, also brush some of the apricot jam around the outside of the cake, it'll help the royal icing to stick to the sponge :)
SHARE:

Wednesday, 19 November 2014

Recipe: Bread & Butter pudding

Bread & Butter pudding straight out of the oven

Bread & Butter pudding with Madagascan vanilla custard
I've been really enjoying cooking and baking again now that I'm not pregnant and repulsed by most foods :P  I've never made bread & butter pudding, my mum used to make it when I was young and I remember it being lovely, so I thought I'd give it a whirl.  I got the recipe from the Sunrise Care website.

Ingredients
6 slices of white bread
30g salted butter
15g currants
60ml semi-skimmed milk
20ml double cream
20g caster sugar
1/4 lemon, zested
Pinch of ground nutmeg
150ml vanilla custard
2 eggs
20g brown sugar

Method
1. Preheat oven to 180C/ fan 160C/ gas mark 4 and butter the baking dish. 
2. Butter the bread, cut the crusts off and arrange a layer at the bottom of the prepared baking dish and top with half of the currants.
3. Repeat Step 2 until the slices of bread and currants have been used. 
4. In a separate bowl cream together the eggs with the sugar until pale yellow, then add the milk, double cream and lemon zest. 
5. Pour the mix over the bread making, ensuring all of the bread is covered. 
6. Sprinkle with nutmeg and brown sugar.
7. Bake for 30-40 minutes until golden brown.
8. Serve with vanilla custard. 

As this is the first time I've made bread & butter pudding, I have nothing to compare it to, what I can say, it turned out to be very tasty and went down well!

It would have been nice if the recipe had said what size baking dish to use, I used the smallest one I have and had to add 2 slices of bread to the mix as 6 slices weren't quite enough - so I had to add extra milk and cream to the mix too :)

Follow me on Google Plus | Bloglovin | Facebook | Twitter | Pinterest


*The cost of the ingredients were covered by Sunrise Care
SHARE:

Monday, 24 February 2014

Recipe: Vegetarian Pitta Pizzas

Last night I was asking on Twitter what I should cook for dinner, the options were a 5 bean chilli, or pitta pizzas.  Well, pitta pizzas won, and I decided to share my recipe with you :)  When I decided to try and do more lifestyle posts on here, recipes were something I was planning on including, I just hadn't gotten around to it yet, so here goes :)

The ingredients

Grill the pittas

Slice the mozzarella

Add the tomato puree to the pittas
spread the tomato puree
Add chorizo to the pittas

Add mozzarella to the pittas

vegetarian pitta pizzas cooked

Vegetarian pitta pizzas

How yummy do these look?  They were super tasty, I love making these, and they're easy and quick. Here's how you do it:

Ingredients
6 x Pitta breads
390g undrained mozzarella
Chorizo style slices (quorn) - or whatever meat topping you'd like
1 x Tomato puree tube

Method
1.  Grill the pittas (both sides)
2.  Cut the mozzarella into small slices
3.  When they're done, cover each pitta with tomato puree and spread it in with a knife
4.  Then, place the chorizo style slices (about 4 per pitta)
5.  Once thats done, arrange the mozzarella on all the pittas
6.  Place under the grill for about 5-10 mins, it's done when the mozzarella is bubbling and turning golden brown
7.  Serve up - this makes 6 pittas, so can serve 2-3 people depending on how hungry you are and if you decide to serve it with some salad or potato wedges

Serving suggestions
* Top off with some chopped coriander
* Instead of tomato puree, you can use BBQ sauce as a base
* If you're not vegetarian, you could put meat on top instead, maybe some shredded chicken or pulled pork

If you decide to make these, please tweet me a picture @twinklinpixi3, I'd love to see your creations :)


This months Biggest-Pixi3 advertiser is the lovely Ash from A Beauty Moment

 
SHARE:
© Makeup-Pixi3. All rights reserved.
BLOGGER TEMPLATE DESIGNED BY pipdig